|
Back to Blog
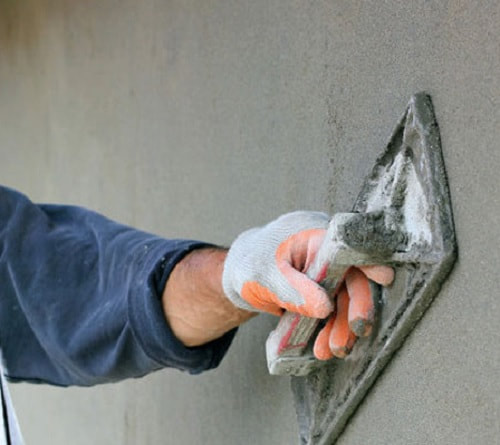
Although some interior walls provide smooth services to make any painting job easy, rendered walls come with a stucco layer over the underlying wood surface or brick. While a lot of homeowners prefer not to paint their newly rendered walls, applying a color coat will be helpful in protecting the surface and offer a good finished look. Here are the steps in painting newly rendered walls. Let your Newly Rendered Walls Get Cured A lot of builders suggest that new stucco needs around 90 days to get the damp rendering get cured. When you paint early, it is likely that this will result in the paint being peeled or blustered. Wash the Walls Using a cellulose sponge and warm water with dishwashing detergent, you can wash your walls. While newly rendered walls can look clean, your paint can adhere correctly through invisible fingerprints. The soap residue must be rinsed from your walls using clean water. Allow your walls to get dry for 24 hours. In order to eliminate dust, lint and cobwebs, you can use a tack cloth. Pat the cloth gently over your walls' surface. Do not rub or scrub the stucco finish. Put Painter's Tape on Areas that Surround the Stucco Walls These areas can include adjoining walls, ceiling, trim and doorways. Place drop cloth or plastic sheet over the furniture and floors so that you can protect these from paint damage. Apply A Coat of Primer to the Walls Choose a primer formulated to be used for stucco finishes. Brush it around the doors, windows and other objects. You can make use of a paint roller that has an 11/2 inches of nap thickness. The primer must be spread over the walls using the roller, in a horizontal zigzag which will be followed by a vertical zigzag making sure that it covers the whole wall surface. Allow the primer to dry for some time based on what is recommended on its label. Apply the Color Coat over the Primer You can use a flat paint so that the thick texture and your wall's pattern will be enhanced. Brush the color against your walls' edges and openings, making borders that have 4 to 6 inches of width. The outer should be overlapped 2 to 3 inches of the boarder you brushed using your paint roller so that you can come up with a nice seal. Let the first coat dry and apply the second coat. If you have found this blog helpful, but need assistance with getting your external walls rendered first, then get in touch. We provide experienced Essex Renderers across the following areas: renderers hornchurch | renderers havering | renderers upminster | renderers romford
0 Comments
Read More
Back to Blog
How to prepare a wall for plastering23/3/2020 Where to begin? The main reason you have your walls rendered is to aid in the weather proofing of the exterior and to create a nice finish with attractive textures. Once your walls have been rendered you can finish the job off with a smooth coat or other textured materials such as small stones. But what steps should you take before having your wall rendered is the main question of concern. How can I prepare my wall to be rendered? In order to prepare your wall to be rendered you must first clean the wall efficiently. Next you want to take a good look over the wall and make sure there are no cracks where the rendering is no longer bonded to the wall. This can be done by tapping the wall lightly; you will hear a hollow or bubbled sound if the render is loose. If you would like to patch a crack, you need to widen the crack first with a screwdriver or even a trowel. This will help to remove all the debris and dust from inside the crack and render. Next use the trowel, and press mortar mix into the crack and smooth out. After a crack has been fixed you want to finish with a render coat, that can be put over the whole crack. This will help to disguise your fix up job. Before actually applying the render coat you will want to wash your wall thoroughly with a power washer. If you notice any mold on the wall you will have to wash it with a fungicide to remove it. When it is time to render a wall, you want to make sure you clean it appropriately with a treatment that can help prevent mold and plant growth. You should also put a coat of lime on the wall as it will help to bond and prepare additional coats. The preparation for rendering the wall should cure for at least 4 days before any render can be added. When you actually apply your render coat make sure you use a thin coat about 8 to 10 mm in thickness because some render coats have shrinkage problems. The first coat of your render should be applied as thin coats and then smoothed with a trowel. You will need to apply the render in a circular motion, and avoid overworking it as this will make lime come to the surface. You should also score the render in diagonal strokes; this will help to create a rough surface for the next coat to catch onto to. The last step involves wetting the render down before applying the last coat to it. This will help ensure that the renders stay in place. The majority of rendering services are done with cement renders. This is the best option if you are looking for a long term fix. If the thought of undertaking the rendering of your external walls is too much to bare - don't worry, for help is at hand. Our plastering team has extensive experience of treating and refreshing all types of external walls with new render. We can provide plasterers Romford and other areas around Essex.
Call today for your free quote.
Back to Blog
Adding external wall insulation (EWI) to the external walls of your property will make a positive difference to how your rooms feel all year round. If you are currently experiencing uncomfortable temperatures throughout your property, i.e. too hot during the summer and too cold in the winter, then installing external wall insulation could be for you. It works by wrapping a building in a thermally resistant cladding before being rendered with a protective, weatherproof finish. Almost like giving it a super warm, coat and then adding a waterproof layer to keep things even more snug. Without EWI, you may find that temperatures in your home vary and maintaining the right temperature is difficult. In the long run, investing in EWI could save you money and once installed you will soon feel the difference as the amount of energy lost is reduced. GK Rend are accustomed to working on all types of property - whatever the size. Do you have a semi, semi-detached or detached property? Or maybe you’re a commercial developer in the process of building a block of flats or office block? Or are you the landlord of an estate or manage a school or carehome? EWI can be applied to any type of building. Not only will your home feel more comfortable – it will also look fresher and more modern adding value to your property. External wall insulation is a service offered by GK Rend to property owners across Essex. Get in touch today by calling 07812 343 766. External wall insulation Romford | External wall insulation Redbridge | External wall insulation Barking and Dagenham | External wall insulation Walthamstow | External wall insulation Waltham Forest | External wall insulation Newham | External wall insulation Tower Hamlets |
External wall insulation Hornchurch
Back to Blog
In extreme temperatures, the coatings on walls and ceilings eventually fails, you need a permanent fixation for odd-effects of damps, waterlogging or cracks. Adding up to the problem, there are always concerns over its maintenance cost and durability of getting your walls painted. Render coating on walls, fences or ceilings in such cases offers the required durability and cost saving for long term.
The traditional plastering is basically a process in which a thin layer of cement like product is applied on the walls. This mixture comprises of sand, cement, lime other proprietary ingredients to make it very strong. Once this mixture is applied on the walls or ceilings, it is going to last for decades. These coatings can however be re-painted after application as per your choice. Renders are applied on all kinds of building structures, no matter if it's an old-school building or modern skyscrapers. These can totally transform the look of a common house built by concrete bricks to a modern good-looking landmark. However, in order to create high decorative walls, the PVC mouldings are used along with solid plasters. In the market you will find varieties of renders: > With smooth finish > Pigmented > Polished > Natural and Coloured finish etc. Different traders offer different types of finishing and styles but choosing the best quality of product is your personal decision. Painting an old wall involves much more concentration and efficiency than a new one, because there are typical problems that you might face while getting it rendered: > Lose or flaky paint > Cracks and holes > Moss or green growth on ceilings and walls > Damps > Water penetration > Previous experimentation on walls > Nails, screws, drillings marks > Lose bricks etc. So, in order to fix these issues, various tools like scrappers, heat guns, latest equipment, paint stripper etc. are used as things like algae, moth or damps might grow back and cause some serious threat to your walls. Anyway, the primary concern of renovating your walls is to enhance its appearance, hence the specification and quality of products should provide a degree of performance. The raw materials and quality should be strong enough to withstand Australian heat, strong winds and heavy rainfall, whilst at the same time preventing the structure for moisture which is the biggest culprit in destroying walls within years. Typically, lime coatings require maintenance every year whereas the film-forming systems require maintenance in every 4-5 years. However, render coating can perform 15 years and upwards. Make your home historic and durable by applying render coatings and offer long-term protections to your walls and fencing. So if you are thinking, "where you can find a renderer near me"? Look no further! We can supply a renderer in East London or a renderer in South Essex. Give the GK Rend team a call today by calling 07812 343 766.
Back to Blog
When your property has damp issues it can not only cause severe damage to the property itself but also health complications to members of your family. So it is good to be observant and take the right measures before any of the damp problems can take root in your property. The best way to tackle such a problem from occurring is to look into damp proofing solutions. There are several solutions on the market so it is always good to take on a professional firm who specialise in such a task as they will be able to advice you on the best solution for your problem. The damp proofing solution will consist of providing the right treatment on your property to help protect you and your family. It is a proven way to countering the penetrating damp within the house walls and the basements of your property as these are the two most common places where damp will get through. Your more modern built properties are often constructed with damp proofing course added to the structure of the building which is part of the building regulations. This is where your older stone built houses have problems with rising damp issues which will cause the increase of moisture. The moisture will then help the growth of mould and often cause respiratory problems among your family members. This is where your damp proofing specialists will be able to help you and advise with a solution to stop it from getting any worse as they will be able to do an assessment on your property on both the external and internal damp problems. The walls and floors below the ground are also more vulnerable to having a higher risk of damp problems, so if your basement is left unattended it will only make your walls more fragile and more likely to become destabilised. However, with the help of a waterproofing basement solution this will take away the problem. Having a recommendation by word and mouth should always be the first port of call when looking for a damp proofing firm, so always ask work colleagues and friends first. Then, after that, search on the internet for a reputable company who are efficient in damp proofing and basement waterproofing solutions and read previous customer comments who have used them before. This will give you an idea of their quality of service and quite often the majority of firms will give a free quotation or survey on your property. GK Rend offer free quotes for all plastering and rendering jobs including damp proofing. Get in touch today on 07812 343 766. damp proofing romford | damp proofing havering | damp proofing hornchurch | damp proofing upminster | damp proofing romford | damp proofing essex
Back to Blog
The team at GK Rend often get calls asking what areas we cover. Being based in Hornchurch gives us excellent access to the M25, A12 and A127 which means that we are never late for a job and can follow-up enquiries to give quotes and assessments for work. Stanford-le-hope is an area that we get called out to regularly. Wikipedia describes it in the following way: Stanford-le-Hope is a town and Church of England parish situated in the county of Essex, England. Often known locally simply as Stanford, the town is within the unitary authority of Thurrock and located 23.8 miles (38.4 km) east of Charing Cross in London. Its principal claim to fame is that Joseph Conrad lived and wrote there. Unlike some other areas of Thurrock, Stanford-le-Hope is surrounded by countryside and farmland. Plastering Stanford-le-hope Our plasterers are renowned for their experience and know how. Our thorough knowledge ensures that we are able to provide quotes for residential and commercial based projects. We have an eye for detail which ensures that the plastering of internal walls and ceilings look as smooth as possible and ready for decoration. Our plasterers Stanford-le-hope, South Essex and East London are ready to take your call for the following services:
Rendering Stanford-le-hope Our renderers can turn even the most dilapidated walls into clean, modern looking jewels. If you are serious about adding value to your home, then hire our Stanford-le-hope renderers today! We are happy to evaluate, cracks, holes, pebble-dash and dated wall decorations so what are you waiting for? In addition to adding value to your home, rendering will also give added protection to your walls which means that they will be longer lasting and require less maintenance. You may be surprised to know that there are different types of render, of varying costs, that can meet your budget. We offer affordable, cost effective rendering options that includes:
Do you need our renderers Standford-le-hope or elsewhere? Then get in touch for your free, no-obligation quote. We look forward to working with you! Call 07812 343 766 today. Havering | Redbridge | Barking and Dagenham | Walthamstow | Waltham Forest | Newham |
Tower Hamlets | Rochford | Basildon | Chelmsford | Brentwood | Southend on Sea
Back to Blog
Screed or screeding, is a word that people usually come into contact with when they embark on undertaking building work. Whether you are planning to do the work yourself, are renovating your own home for the first time, or have a portfolio of several houses that your team have built from scratch – somewhere along the line you will need to screed a floor or two.
What is screed? Floors are something that we walk across each day and we take it for granted that they are flat and even. For rooms that are newly built (or have underfloor heating) it’s imperative that the surface is level as it allows for a better finish when laying tiles, carpet or tiling. Screed is a specialist concrete mix that ensures a floor is flat and is used to level out a concrete sub base. Can screed be used on all types of floors? Screed is a versatile mix that can be used in all types of properties – domestic, commercial and industrial. If the screed is due to be used for heavy footfall/equipment, the mixture can be adapted to withstand the additional weight and traffic. Is there more than one type of screed? There are four main types of screed. In addition, it is possible for screeds to be mixed differently to a range of admixtures that will give varying qualities. The different type of screeds are: Bonded screeds By using a specialist bonding agent or primer, bonded screed is applied to a pre-prepared concrete sub-base with the intention of maximising the potential bond. This variety of screed can be used when a thinner screed is needed. Unbonded screeds Unbonded screeds are laid onto a damp-proof membrane or polythene sheeting. This separates the final layer of screed from the concrete base substrate. This variety of screed is often applied to older concrete sub-bases. Underfloor heating screed and floating screed. Floating screed is laid on to a layer of thermal insulation. The insulation is usually on top of a damp proof membrane which would then be separated by the existing concrete sub-base. The only difference between underfloor heating screed and floating screed, is that it is laid over underfloor heating pipes and not insulating material. How long does screed take to dry/cure? The time taken for screed to dry or cure differs and depends on the type of screed and its thickness. It’s best not to walk on freshly laid screed for at least 24 to 48 hours. In some cases, however, with the use of certain additives, drying time could be reduced to 12 hours. We recommend leaving screed to dry for up to 7 days before moving furniture around etc, although most screeds will reach their fully cured strength after 28 days. So, for best results, be patient and wait for this time to pass before laying tiles or carpet. GK Rend have lay screeds in Romford, Barking and Dagenham, Havering and across South Essex and East London. Contact one of our friendly members of staff to give you a quote for your screed job/project today. We will advise you about which type of screed is most appropriate for your flooring. Havering | Redbridge | Barking and Dagenham | Walthamstow | Waltham Forest | Newham | Tower Hamlets | Rochford | Basildon | Chelmsford | Brentwood | South End on Sea
Back to Blog
Every year we see the prices of our utility bills increase. Whether it’s for gas, electricity or water, it can feel like we’re constantly paying more for these services, despite receiving a meagre annual increase to our salaries.
According to a report from University College London our electricity and gas bills rose by £2bn in the year after the 2016 referendum result because of the plummeting value of the pound. With Brexit on the horizon, there are valid fears of future energy price hikes. Trying to keep these bills low for a home, office or building block can be a struggle. There are many types of heating systems (like underfloor heating) that can heat a large surface area for a lower cost compared to traditional radiators. Whilst this method is concentrated on heating rooms from the inside, External Wall Insulation (EWI) differs, as it works by adding an external layer to a building that holds the heat in. EWI is not a cheap process, but is one that can provide a long term reduction of heating bills. The process involves adding, to external walls, a material that is insulated. A professional renderer will then apply a protective render in order to make the external walls look clean and modern. Nowadays, decorative coatings and cladding can be used for homes of all styles and periods including, Edwardian, Victorian and Georgian. Whilst the cost of external insulation can be higher than insulation for internal walls, it has the added advantages of providing insulation against damp and noise pollution. It is also a great way to boost the efficiency and subsequent value of a property. There’s no getting away from the fact that EWI is a good long term investment that will help reduce your energy consumption as well as saving you money on those bills. Are you ready to have a chat about applying this to the walls of your home? Call us today on 07812 343 766.
Back to Blog
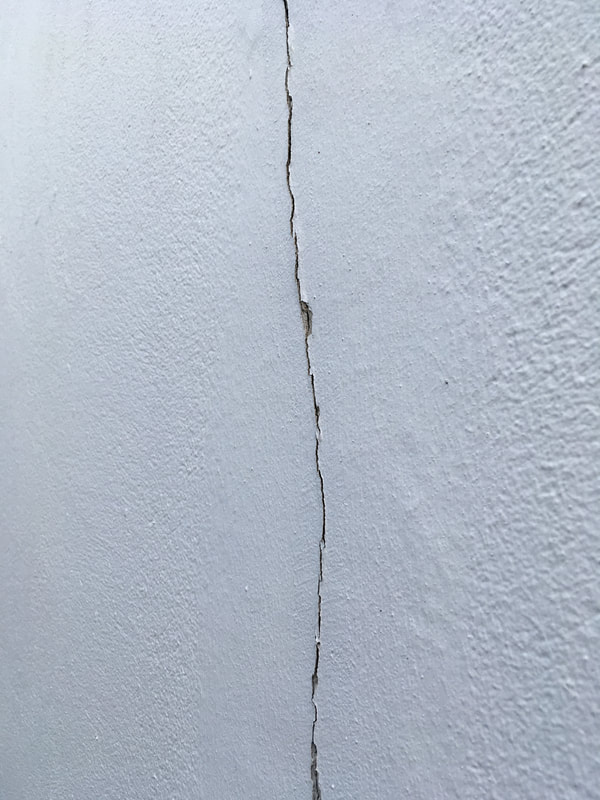
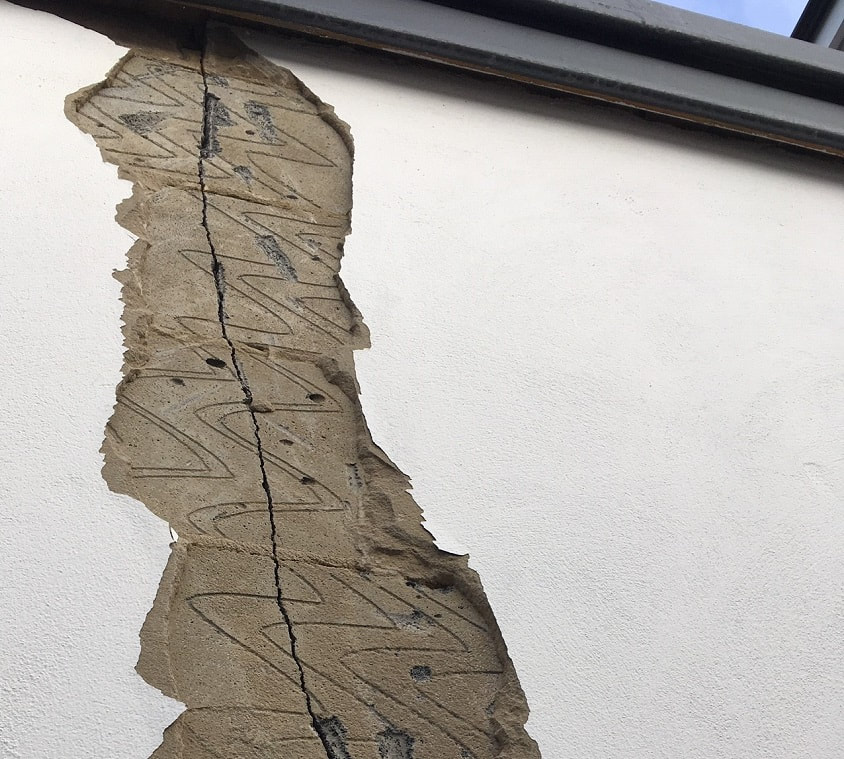
Has your dream come true recently by having your kitchen extended? Or has your budget allowed you to widen the side and top of your property by building a single or double storey extension to the side and/or back? If you have answered yes to either of these questions, a year or so down the line you might be asking why cracks have started to appear on the outside wall/s of the new extension. If this crack appears like a thin line it is most likely to be a hairline crack. This can occur for various reasons. One answer is that, sometimes, if the plaster is no longer making contact with the wall the plaster could have blown. This can be confirmed by tapping on the plaster and hearing a hollow sound. The image on the left shows a hairline crack on a newly built kitchen extension. The image on the right reveals the depth of the damage underneath the render. One reason why your plaster may have blown is due to salt being present in the walls. If there has been a previous problem with damp, the salt from the moisture can work its way to the surface as the moisture starts to dissolve. To ensure that future plaster sticks to the walls properly, a special salt treatment can be applied to ensure that this problem does not reoccur.
New builds and new extensions often get cracks due to settlement. This is literally a period needed by the property to ‘settle down’. Cracks can appear between the ceiling and wall or around doors and windows. All very annoying when you’ve just spent a fortune and your new home doesn’t look very new anymore. So, what’s the answer? Let your property settle for a couple of years and then get in touch with the team at GK Rend. We will plaster your cracks and make your extension look like brand new again. If you can’t wait and would like advice now - call 07812 343 766.
Back to Blog
Tips on how to add value to your home19/7/2019 If you’ve come into some money, been saving for ages or have bitten the bullet and decided to take out a loan to get your renovation project started – then keep reading for some top tips on how you can add value to your home. Remodelling your home need not cost the earth, but you want to make sure that the changes you do make add value to your home. It’s nice to know that the money you put in to updating your home, you’ll get back when you’re ready to sell. Even if you have no intention of selling your home for the next 20 years, it’s still worth considering which changes will improve your current living conditions. Installing a downstairs toilet, converting the loft or extending the kitchen are structural changes that can add immediate value and help to sell your property when the time is right. Top tip 1 – fix existing problems Consider making changes to parts of the house that already exist. Don’t be lazy and let things fester, as it can often mean that the problems can worsen and ultimately cost more to fix. Go through each room with a checklist that includes:
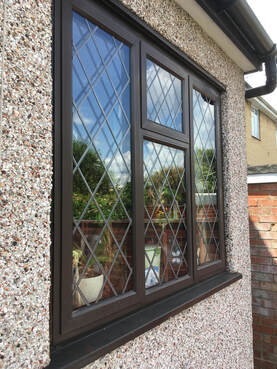 Top tip 2 – update your windows The value of your property can increase if you change your windows to ones that are double-glazed. This is often an important ‘must have’ for buyers when looking for a property. It may set you back a few thousand, but it is worth investing in good quality windows that meet with current building regulations. Top tip 3 – clean up your garden Adding value to your property means reviewing the areas both inside and outside of your home. The garden can often be overlooked as it takes regular maintenance. However, an attractive, well designed garden will not only bring harmony to your home, but will also get those looking to buy, signing on the dotted line. If hiring a landscape designer in is out of your budget then it’s time to get your hands dirty. You don’t have to be Alan Titchmarsh to create improvements. There are ample resources out there to help you understand gardening basics – from searching online, to accessing your local library. Charity shops are also a great source of cheap literature. What you can start doing is: pulling up weeds, planting some annuals, repairing and painting fences, creating distinct areas (for eating/storage/play), adding decking/patio area for entertaining, feeding and repairing the lawn. Top tip 4 – review each room Getting rooms in order and looking their most optimum, takes some organising, but is a great action to tick off your list. It’s also something that, in part, you can take care of yourself if you feel confident doing so. Look through each room and declutter non-essential items. Take them to the charity shop, give them away or sell them on ebay – anything other than letting them sit there gathering dust and taking up valuable space! Also review whether or not the following problems exist: • are there any cracks/mould on your walls or ceilings? • is the paint work in tact or peeling? • are windows, doors and handles working properly? Do they squeak, creak or stick? • in what condition is the grouting/sealants in your kitchen and bathroom? • are the taps leaking/dripping? • is the edging of your carpets frayed or are broken tiles/lino apparent? None of these are expensive to repair, but it can make such a difference to your home. Top tip 5 – adding kerb appeal The outside of your home is the first thing that people see and as the saying goes – first impressions count! If you have a front garden, review tip 3 and make sure it’s clean, tidy and weed free. Buy storage units or large bins for your weekly rubbish and weed the drive when the car is not on the drive. Wipe down windows, paint/repair the fence if needed and replace/update the signage or house number. If your external walls are looking tired and dated, you might also want to consider rendering the walls. This will immediately add a modern, new look and scratch render can be applied in bright, modern colours. Whilst many of these top tips are jobs that can be done be done by you, GK Rend are here to help! We plaster cracks, skim walls, apply dry lining and render external walls. Give us a call today if you want your plastering and rendering jobs scheduled in.
Back to Blog
How much does a plasterer cost?19/6/2019 When planning your plastering project here are a few important elements to factor into your planning/budget:
What does it cost to plaster a wall or room? How much should you expect to pay?
Depending on where you are in the UK, prices will vary for plastering work. The bottom line is that you get what you pay for. Going for the cheapest quote is not always the best option and may not get you the finished look that you require. Any good plasterer will have a portfolio of their work that they can share with you, so that you can see the work that they have previously undertaken. Also consider what it is that you need doing. Are you looking to patch up part of your wall and therefore need a repair? Or do you need one wall plastered or are you looking to have a whole room skimmed? Patch repair vs skimming a wall If you are planning to paint a wall and need a small patch of wall repaired, you may get a better finish by skimming over the whole wall. Patch repairs can leave the patch with a different texture, which would be noticeable through the paint. But if you plan to wallpaper your room, a patch repair would suffice. How long does it take to plaster a wall? For a small repair, usually couple of hours for small repair. For a whole wall allow half a day. How long does it take for plaster to dry? Plaster will normally be dry within a week but may take longer in the colder weather. If you want to paint the walls, you should leave it for around 10 days - you will be able to see when the plaster is completely dry as the colour will lighten in shade. How much does a plasterer cost? Most plasterers wouldn’t take on a job for less than £150.00 - even for a patch repair. It's not only the cost of the materials, but it is their time, fuel costs, as well as tax and National Insurance. Are you looking to get a price for plastering your wall? We can help! Get in touch today on 07812 343 766.
Back to Blog
Are you planning to decorate an internal wall? Would you like to know if it's possible to to plaster over paint? This is something that you could leave for your plasterer to take care of, or if you wanted to save some of your budget, you could do some preparation before the plastering professionals arrive. What is plastering? Why should I plaster first?If your walls are uneven or rough, if you want a perfect finish to your walls, we recommend plastering or skimming. Plastering is usually done on walls and ceilings. As well as providing a smooth finish, plastering can provide structural support to the wall or ceiling too. Can I plaster over painted walls?The answer is yes! Plastering over paint is a possibility, but it's essential that you ask yourself the following questions first: 1 Are the walls free from damages and cracks? 2 Has the existing paint peeled at all? If you have replied yes to either of these questions, then additional preparation will be needed before the plaster can be applied. Should I hire a professional plasterer?Whilst you may be an avid DIYer there are some jobs that are not worth risking. The investment in professional services will pay itself off in the long run. After all, you don't want to sit back and stare at uneven walls for the foreseeable future. Plastering is a highly technical skill. Hiring a professional plasterer, will guarantee that your walls will be perfectly smooth once the plaster has been applied. What's more is that when you go to paint it afterwards that the paint will bond properly. Preparing the room for your plastererBefore your plasterer starts, it is essential to clear the room out or cover anything that can’t be taken out of the room. Plastering is a messy job - regardless of who does it. If you are planning on keeping your existing flooring, make sure that it is properly covered up. We recommend a professional carpet protector that has a sticky back, as dust sheets will move and don't ensure complete protection. Your plasterer will need access to a water supply - make sure that the route to the water supply is protected too. Should I remove old skirting boards?This depends on whether you want to keep them or not. If you want new ones, then removing them beforehand will save your plasterer having to do it.
Most plasterers will find it easier (and prefer) to plaster down to an inch or two above the floor rather than to skim down to the top of skirting. If you want to keep your skirting boards in place, then any good plasterers will be able to skim down to the existing skirting boards. Note that this is more time consuming and will increase the cost of the job. If you would like to know more about what is required for your renovation, give us a call today. |
GK Rend
[email protected] / 07812 343 766
Monday to Friday - 8am to 5pm
Copyright © 2024. All rights reserved.
Website designed and maintained by Perfect Layout Digital Marketing
[email protected] / 07812 343 766
Monday to Friday - 8am to 5pm
Copyright © 2024. All rights reserved.
Website designed and maintained by Perfect Layout Digital Marketing

